Wednesday, March 21, 2007

*sigh* glitches.....

Got to thinking while flipping through some old pictures....
Maybe this child did come by it honestly.
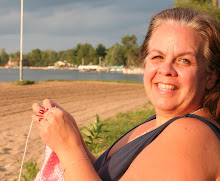
She's the new 26 year old around my house.
*sigh* had a really great tribute to my Mom and her sisters talking about these scarves
However, as I went to post it, AOL service had a 'glitch' in it's program, shut down and lost everything. It's going to take me awhile to rewrite it all. I was less than thrilled, I tell ya!
Therefore, I'll leave you with this update on the current baby blanket:

Monday, March 19, 2007

Steph's Sparkly Hat

Knitting for family is generally on or near the top of most knitters' lists. I am no exception. Having my daughter home for a few extra days because of the Northeast weather has given me the time to work on a hat to fit her. She wears an adult small size and nothing that I've made her in the past has fit well. (doesn't help to not have her around often to fit her) Last night I had her go through multiple hats to test which size, style, and fibers she wanted. I was hoping to make her one to match the "H" Mall Store Rib Knit Scarf I'd just finished. Apparently, the previous beanies I'd made for her were too short and she wasn't thrilled with the 'look' once on her head. When she demonstrated, I immediately understood.

What we came up with is a combination from a lot of hats. One was too long, one too loose, one just right around but way too short...on and on... She wanted a hat that would feel 'snug' but not too loose, come to the end of her ears, with a small cuff, but not too high. I think Houston, we may have lift off.

The Lion Brand Wool-Ease that I used for her scarf has the iridescent thread in it that I was looking for. After using the chunky weight for the scarf, the worsted weight is what we picked for her hat. The original scarf had a red iridescent thread running through it which is what lead me to this one.
Now, here's the inside of the cuff. You'll notice that it's done with a twisted rib. Why? it's my favorite ribbing. A 2 x 2 twisted rib. I learned it many years ago with a sweater pattern. Heaven knows I can't remember which sweater. But I really loved the way it kept my stitches from being too loose, and I learned that not all ribs had to be a 1 x 1. I was young. What can I say?

Today I don't need the twisted rib for tightening up, rather I like the design. I use this on nearly all of my beanies. and hats. It's rare that I don't. If you don't want to twist your stitches, go right ahead with a plain 2 x 2 rib or a 1 x 1...it's up to you and what you're going to prefer. This is just my preference. I know that when the cuff is folded up it won't show. That's ok with me. I am going to be making her a second hat with the same basic construction without a flip up cuff.

Looking on the top of the crown, you'll get an idea how the decrease section lays.


Steph’s Sparkly Hat
©Cathy Waldie, March 18, 2007

size adult small
1 skein Lion Brand Wool-Ease worsted weight, white multi, label [2 1/2 ozs/70 g, 162 yds/146 m, 78% acrylic, 19% wool, 3% polyester, 18 sts/24rows on (us) 8 (5.0mm)]
(US)5 (3.75mm) and (US)6 (4.0mm) 16” / 40cm needles
(US) 6 (4.0mm) 24”/60 cm needle
Chibi needle
Stitch marker
Twisted rib stitch = Round one, *K2, P2* repeat around
Round two=*K1 in the back of the loop, K1 in the back of the loop, P2* repeat around.
Repeat rounds one and two for desired length.

Using size (US) 5 (3.75mm) needle, cast on 100 sts. Be careful not to twist the stitches. Join to knit in the round and place marker.


Knit in K2, P2 twisted rib for 30 rounds.
On the last row...decrease 1 stitch (99 sts)

Switching to (US) 6 (4.0mm) needles st. st for 25 rounds

Begin decrease rounds:
1: *K7, K2 tog* around (88 sts)
2: K around
3: *K6, K2 tog* around (77 sts)
4: K around
5: *K5, k2 tog* around (66 sts)
6: K around
7: *K4, K2 tog* around (55 sts)
8: Knit around
9: *K3, K2 tog* around (44 sts)
10: Knit around
11: *K2, K2tog* around (33 sts)
12: Knit around
13: *K1, K2 tog* around (22 sts)
14: Knit around
15: *K2 tog* around (11 sts)
16: *K2 tog* around (6 sts)
Cut yarn to approximately 18". Weave through stitches (twice), pull tight, and fasten off.
Weave in tails.

The next project well under way is the first of the two Feather and Fan Rainbow Baby Blankets.


Did you know there is an easy, visual way to double check this pattern to make sure you are right on the money? Look in the center of the top of your arch. That center stitch should be straight up the middle. if you look at the last arch on the left side, you'll know for sure that you've done this well. If you are off a stitch or two, that center 'line' won't be straight. Trust me. Take a guess how I learned?

This is the second time I've used Caron Simply Soft yarn. Maybe it's just me, but the white just seems a little on the thin side. Maybe it's just that I'm used to the TLC Lustre. Or maybe it's just a skein that is a bit on the thin side.

In the last section for today...I bring you this picture to speak on it's own. (yes, I know this is the cheap stuff in town, but please already....) All I have to ask is,
What's Left in YOUR Wallet?

Friday, March 16, 2007

Red Banket...is fini!

UPDATE 3/19/07: I guess I should have mentioned, and I apologize for not! That I used my NMCRS Basketweave Blanket V.2 pattern that you can find over on the left side of the page under the Wishing I was Knitting at the Lake Pattern section. If you click on the pattern name, hopefully the link will take you to the day where I'd posted the pattern in the past! Thanks for all the interest in this pattern! I hope you love this one as much as I do! The pattern is over there

<<<<-------------------------------------------

I am happy to say, the red blanket is all finished! Once again, I love this pattern. I've made several blankets from this, and I will continue to make more. It's a fast pattern that I've used to teach beginning knitters how to knit and purl in the same row making a project that they could enjoy having and had requested. It's also perfect for taking along to work on while at sporting event your kids are in, or for tv/movie watching. One row knit, one row of simple counting up to eight. And if you're really good, you can knit this with your eyes closed!

The original pattern was written with 100% acrylic in mind. While making baby blankets for the NMCRS (Navy-Marine Corps Relief Society) with the yarn (Red Heart's TLC Lustre) they supplied, I wanted to try my hand at writing some of my own patterns. There are a few things I noticed with this different fiber content starting with the way it knitted up 'shorter' than my previous blankets. I'm assuming that is due to the cotton content. To combat that effect, I extended the pattern repeats once more for a total of nine, rather than the original pattern of eight.

Knitting Stats:

9 pattern repeats to allow for cotton shrinkage
5 skeins of yarn - Lion Brand Cotton-Ease, in Cherry Red, [ label: 17 sts/24 rows=4"/10 cm, with (US)8 (5.0 mm), 50% cotton, 50% acrylic, 3.5 oz (100 g), 207 yds, 188 m]
size (US) 8 (5.0 mm) Addi Turbo needles

Pre-dryer blocking:
36" x 38.5" slightly stretched...(smoothed out on the bed)
gauge preblock: 16 sts x 24 rows = 4"/10 cm in stockinette st.

Post-dryer blocking:
33 3/4" x 38 1/2"
15 sts x 23.5 rows = 4"/ 10 cm in st. st.

Noticed while knitting this project:
This reminded of the cotton blankets my grandmother used to have for 'summertime' use. I did end up with some red fuzz on my black dress pants while working on it. Not to worry...it all brushed off easily.

Noticed after I finished this project:
I spritzed the blanket with a mist bottle, and popped it into the dryer for roughly ten minutes. AND BOY am I sad that Lion Brand has decided NOT to keep their primary colors for this yarn! It's soooooooooooooooooooooooooooo soft! I would have loved some little white blankets for my kids way back when...or to have made along the way for baby gifts!

When I bought up the Cotton-Ease after Lion Brand decided to discontinue this 'flavor', I had only been thinking of Chemo Caps with it. How little did I know! I just love how soft this little blanket turned out! I hope that the little one who ends up all wrapped up in this blanket will agree with me, and spend many hours dreaming of only things babies can dream of. Oh, heck! I wish I had enough on hand to make myself an afghan out of this! Yes, I probably have enough orange to do so, or the yellow color, but since I'm not the Great Pumpkin or a bumble bee...I won't be making myself an afghan out of Cotton-Ease anytime soon! Drats.

Now, if I could just get them to make Blue and Maize colors!


And a big thank you for the Boston area weather today...baby girl gets 3 extra days at home with mommy before she heads back. Her flight was finally cancelled at 7pm tonight...she's happy...more beach days..I'm happy...more days to see my kid! I just might have to make her a sparkley hat to go with her sparkley scarf....

Thursday, March 15, 2007

that "H" Mall Store Rib Knit Scarf

A couple of years ago, the 'baby' of the family was working over the winter holidays in one of those trendy teenaged clothing stores at the mall. Rather than call it out by name...we'll refer to it as that 'H' Mall Store. The company hires a LOT of teenagers, but gives them each very few hours. I think they're waiting for them to spend their whole paychecks and their parents' paychecks on the clothes in the store. (Not too bad a marketing idea-eh? Lots of teenagers, few hours to pay each, no benefits, lots of teenagers handling the clothes, thus wearing their paychecks around the high school, free advertising to the rest of the teenaged population...)

They do have a rather great selection of scarves in the fall. Unfortunately, I didn't know early enough that she wanted a particular one until the last moments of that holiday 'rush/crunch/when do I pick it up while she's not working/so she won't know ahead of time/will I get the right one' shopping season?..ya..one of those moments.

Taking her sister into the store on her night off (praying we wouldn't run into her shopping at the same time) helped me to figure out which scarf she wanted. Wouldn't you know it, they were out of the white color she wanted but did have a red one in stock. According to her co-workers there, who swore to secrecy, they would be getting in another shipment in the next few days post Christmas, and daughter would be able to exchange it at that time. YAAAAAAAAAAAAAAAAAAAAAA...uh ahhhhhhhhhh......I think that group of kids would be able to sell ice cubes to Eskimos, too!

While they did keep the secret, the shipment never happened. Big surprise? The more I thought about the scarf the more I knew I could duplicate it in her preferred white color. Why? Because I've seen a comparable yarn from Lion Brand both in the chunky and worsted weights. The red one as I eyeballed it, appeared to have been on size 11-13/s with the chunky yarn. I also figured it would work with double stranding the worsted if the chunky didn't work out well. The chunky did work well...and I am now working up a second scarf with double strands of Plymouth Encore using 2 colors of green sage. Not at the same time. I'm using each color for 4 rows at a time and like the way that's turning out as well. That gives two different looks for the same pattern that knits up very quickly.
A few notes here. I slipped the first edge stitches both as if to knit and as if to purl on different sides of the scarf. I liked the way the edges laid using both, rather than my usual 'slipping as if to knit' for both sides. With the ribbing it looked better.
To slip as if to knit, use the first stitch on your left needle. Insert your right needle to the left of that first stitch, from the front of your left needle towards the back of your work. Now, rather than using your yarn to create a new stitch, just slide that stitch off of the left needle onto the right needle. Continue with your pattern as needed for your second stitch.
To slip as if to purl, insert your right needle from the right side of your stitch toward the left, in front of your work and slip that stitch off of your left needle onto your right needle. Again, proceeding with your pattern with the next stitch. Clear as mud?
The rib knit on this scarf works well with both weights of yarn. It 'springs' back toward itself making it a very warm scarf to wear. Use either size 11 or 13 needles, the larger ones giving you a wee bit bigger scarf and loser fabric. It's a scarf, so you don't need to have it 'fit' as if you were making a garment to wear. Your preference.

Daughter came home from the frozen country yesterday and when she saw the new white scarf, she was plenty happy with it. I'm sure she will give me an update next week after returning to the below zero temps. However, she quickly tossed it to the side as she dug out her bathing suit while her friends were in the driveway waiting for their trip to the beach. We've had between 88-92* temps while she had been walking between classes in -11*F back there. Happy she was, but not wanting to invest much time in the wool blended scarf. (I wonder why!)

She has some very definite ideas of the clothes she will wear, and what she won't wear. I wouldn't say picky, just knows what she's looking for. Why knit something she's not going to pull out from under the bed? (ya, like three red and white scarves when I wasn't paying attention to what I'd already finished? and she's not a big 'wear the school colors in college' kinda girl. She'd prefer to wear colors that go with her clothes that look nice. mmmm...go figure. ha ha ha)

Hopefully your computers can see the 'sparkles' in this yarn. The camera didn't pick it up nearly as well as your eyes can see it. It is there. I promise.

Steph’s Sparkle Scarf
(aka)
That ‘H’ Mall Store Rib Knit Scarf
© Cathy Waldie, February 26, 2007
2 skeins, Lion Brand Chunky Wool-Ease [Label: 5ozs. 140 gms, 153 yards, 140 m, 14 sts/18 rows on (US) 10.5 (6.5mm) needles]
Gauge in pattern: 17 sts/14 rows
Finished size : 6” x 78” without fringe
(US) 11 (8.0mm ) needles

If the scarf is going to have fringe, cut your fringe first from both skeins of yarn and set them aside. This will give you almost an identical amount of yarn length from both skeins as you knit. That means at the time you have to add the second skein while you are knitting the scarf, your join will be somewhat in the center of the scarf. I cut 15“lengths for this. 26 x 2 = 52 strands. I used them double on each end, meaning, 13 x 2 strands for each end of the scarf.

Cast on 29 stitches
1: k1, (p1,K1) 14 times
2: sl 1 as if to knit, (k1, p1) 14 times
3: sl 1 as if to purl, (p1, k1) 14 times.
Repeat rows 2 and 3 until desired length. Bind off.
Add fringe if desired. 26 strands each end, 2 x 13 across each end.

Tuesday, March 13, 2007

A Special Day in Pictures

Yesterday was a kind of day for the oldest daughter...we started out at the where we had because it was her . One friend gave her so she could get the autograph's of and before she had some of. Later in the day another friend joined the celebration while we had before they all went out for dinner with more friends. Happy 26th Birthday daughter of mine!
love,


Once home it appears that there's a LOT of this color
going on around here lately...so I do believe it's time for some of these per middle daughter's request. Now, we're waiting the arrival of the 'baby' as she prepares to thaw out while enjoying a few days of spring break before heading back to with her new . Son, meanwhile, continues to send text messages from Florida from his spring break trip. Hoping to see him in another week or so!

Saturday, March 10, 2007

Cup-ee-cakes and a red blanket

Sooooooo, what do you do when your daughter turns 26 and decides to have a slumber party with some of her high school and college friends?
Why you make pink and purple Rice Krispy treats and Fun-fettie 'cup-ee-cakes' (ode to Troop Beverly Hills back in the day of multiple slumber parties at my house) of course! (add a few drops of food coloring to the marshmallows before you melt them)

Then you come home and knit after you drop them off, knowing you don't have to clean up the mess!


The red blanket is coming along nicely now that I've restarted it. The original pattern was written for a (US) 9 needle (6.0mm) and with the Cotton-ease, the fabric it created was just too loose. It looked like stitches were pulled in some weird fashion. I didn't like it. Using a size (US) 8 (5.0mm) needle makes it much nicer and I'm a lot happier with these results.
I've used Cotton-ease for Chemo caps in the past and liked the results. They knit up into soft caps. I'm really surprised with how light weight this blanket feels in my lap as I'm working on it. It's going to make a great summer-weight blanket. I'm still sad to see that first they discontinued this yarn, then brought it back in different colors. Too bad they couldn't have kept the traditional primary colors in the line. I'm not a fan of the new line of colors. To me they remind me of the 80's country colors everyone's kitchens had to be. However, I can't wait to see how this red blanket looks after it goes for a 10 minute tumble in the dryer. For now, the pattern is popping out very nicely in this yarn and shows the lines quite well. For the price, I wish I'd have known how much I liked this yarn in baby blankets before they changed it all up.

*sigh* Story of my life...day late, dollar short.

Regan's hat

Back in 2004, my niece was turning 10 years old. To mark the occasion I wanted to knit her a poncho that was the 'hot new thing' to wear to school. I picked a pattern from Easy Knitting magazine that had been in a light pink color. My niece, however, is NOT a pink girl. She likes red and purlpe. I went for red this time.

As the poncho progressed, it just didn't look quite right in a single color and boy was it bright! There was a lot of red there! Starting over adding black for the ridges in the pattern toned it down to a point where dark sunglasses were no longer needed. Even though it was being made with acrylic (Red Heart Kids) so my brother could deal with the laundry easier, Southern California was in the midst of a heat wave! It was 104* while the double stranded poncho was on my lap!
When it was all finished, it seemed to be begging for a hat to complete the outfit. After all, a young lady walking to school needed the whole outfit-right? I've since made this hat up in both the red and black combination and with a white background and each ridge in another color of the rainbow. Feel free to combine your favorite school/team colors, or colors to match a special outfit.
Regan’s Hat
© Cathy Waldie, August, 2004

(US) 7 (4.5mm) 16” (40 cm) circular needle
Stitch marker
Scissors
Chibi needle
2 (or more) colors of worsted weight yarn
~ 2 ¾ hours
Large sized Child’s hat

*sample made with Red Heart Kids

Cast on 90 stitches with black, place marker, join in the round, being careful not to twist.
1-8: K 8 rounds in black (the hat will roll up creating the brim)
9-13: K 5 rounds in red
14: K 1 round in black
15: P 1 round in black
16-43: Repeat rows (9-15) 4 more times for a total of 5 pattern repeats

Begin decrease rows:
44: In Red: Knit around (90 sts)
45: *K7, K2 tog* around (80 sts)
46: *K6, K2 Tog* around (70 sts)
47: Knit around
48: *K5, K2 Tog* around (60 sts)
49: In Black: *K4, K2 Tog* around (50 sts)
50: Purl around
51: In Red: *K3, K2 Tog* around (40 sts)
52: Knit around
53: *K2, K2 Tog* around (30 sts)
54: Knit around
55: *K1, K2 Tog* around (20 sts)
56: In Black: *K2 Tog* around (10 sts)
57: *P2 Tog* around (5 sts)

Cut yarn, leaving a tail 12-18” long. Weave through the remaining stitches on needle, pull tight and secure. Weave in ends.